Although we can see the game board the computer still can't really see it. It's kind of like in the last post when we had worked out the purple areas but still had to do a little processing for the computer to be able to make sense of it. What we need to do is represent the game board in a way the computer can understand it and that is what this post, and the end of Step 1, is going to be all about.
 |
| Our captured game board |
Looking at the game board image again you can see that the game board is split into a grid 10 squares wide by 10 squares high. Each of these squares is the same size so we should be able to easily work out where each one is by dividing our image in the same fashion. However, because of the space taken up by the purple border of the game board we will probably find that the image doesn't divide up as evenly as the spaces on the game board. We'll go ahead and do the dividing with the bordered image regardless though as depending on how far it is out we may still be able to use the results and even if we can't we'll use the same routine we make here later on when we've processed the image a little more.
Lets draw some grid lines on the image to see what it looks like. Here is the code and you can see from the first and last lines that I've put it in between the creation of the ROI image and the displaying of it.
EDIT - This code is a bit wrong but it is fixed in the next portion.

Mat roi(screen, bounds);
//Draw onto the image red grid lines in a 10 by 10 structure
int tenthWidth = bounds.width / 10;
int tenthHeight = bounds.height / 10;
for (int x = 0; x < 10; x++) {
    for (int y = 0; y < 10; y++) {
        Point p1 = Point(tenthWidth * x, tenthHeight * y);
        Point p2 = Point(((tenthWidth * x) + bounds.width), tenthHeight * y);
        Point p3 = Point(tenthWidth * x, tenthHeight * y);
        Point p4 = Point(tenthWidth * x, (tenthHeight * y) + bounds.height);
        line(roi, p1, p2, Scalar(0, 0, 255), 3);
        line(roi, p3, p4, Scalar(0, 0, 255), 3);
        }
    }
//display
namedWindow("ROI", CV_WINDOW_AUTOSIZE);
imshow("ROI", roi);
 |
| The game board divided into a 10 x 10 grid. A bit squint because of the purple border throwing things off. |
Back when we calculated the bounding boxes of the contours of the purple border there was one in the bottom left corner that was a perfect outline of the horizontal part of the border, we can grab the height of that and assume that it is the same all the way round. If you weren't as fortunate as me to get a bit of border that doesn't have a corner on it then you can just capture a screen shot of it running and then edit it in paint so that the border isn't joined to the corner.
To get the thickness of the bounding box we add the following (using temp.height if it's a horizontal line and temp.width if it is a vertical one) into the same routine as we get the bounds of big contours using arcLength:
char height [4];
sprintf(height, "%d", temp.height);
putText(drawing, height, Point(temp.x, temp.y), FONT_HERSHEY_SIMPLEX, 1, Scalar(255, 0, 0));
 |
| The 'Contours' window showing the height of the blue bounding boxes. Our box of interest is the small long one on the bottom left. |
//Draw onto the image red grid lines in a 10 by 10 structure
int tenthWidth = (bounds.width - 22) / 10;
int tenthHeight = (bounds.height - 22) / 10;
for (int x = 0; x < 10; x++) {
//      for (int y = 0; y < 10; y++) {
    Point p1 = Point((tenthWidth * x) + 11, 11);
    Point p2 = Point(((tenthWidth * x) + 11), (bounds.height - 11));
    Point p3 = Point(11 , ((tenthHeight * x) + 11));
    Point p4 = Point((bounds.width - 11), ((tenthHeight * x) + 11));
    line(roi, p1, p2, Scalar(0, 0, 255), 3);
    line(roi, p3, p4, Scalar(0, 0, 255), 3);
//        }
    }
 |
| Re-aligned game board grid. |
Now what we actually need is a cut out of each of the game pieces that we have marked out with our red lines. There is a number of ways we could do this but the approach I am going to take is to find the top-left corner of each piece and extract it using the rectangle and ROI method we used earlier for the game board. First let's mark each corner with a blue dot so we can make sure we have the right place to start from.
We worked out a routine to do this earlier in the post which I marked as being a little wrong. It was wrong for what we wanted to do then (although it done the job) but for what we want to do here it is just about right. Keep the proper piece of code for drawing in the lines and change the mistaken code to the following and move it to after the line drawing code:
//Draw blue dots at the corner of each game piece
for (int x = 0; x < 10; x++) {
    for (int y = 0; y < 10; y++) {
        Point p1 = Point((tenthWidth * x) + 11, (tenthHeight * y) + 11);
        Point p2 = Point(((tenthWidth * x) + 12), (tenthHeight * y) + 11);
        line(roi, p1, p2, Scalar(255, 0, 0), 3);
    }
}
 |
| Game board with the corner of each piece marked out. |
//Draw a green rectangle round each game piece
cout << tenthWidth << " " << tenthHeight;
fflush(stdout);for (int x = 0; x < 10; x++) {
for (int y = 0; y < 10; y++) {
     Point p1 = Point((tenthWidth * x) + 11, (tenthHeight * y) + 11);
     rectangle(roi, Rect(p1.x, p1.y, tenthHeight, tenthWidth), Scalar(0, 255, 0), 1, 8);
    }
}
 |
| Game pieces marked out with a green rectangle. |
Of course just drawing rectangles isn't enough, we need to grab the data from within those rectangles and analyse them similarly to how we are analysing the whole game board just now. A couple of small changes and we can have that. We are going to store lots of small Mats which we'll then perform some calculations on to get the state of our game board, also known as our game state. First we make the store for them which is going to be a vector of Mats and we put this just before the code where we draw the green rectangle and then we change the rectangle drawing code to fill the vector with Mats. Finally we display all these images individually in their own windows. Don't worry, it's not as complicated as it may sound, here is the code:
//Create a Mat out each of the game pieces and store it in the vector
Vector<Mat> gamePieces;
for (int x = 0; x < 10; x++) {
    for (int y = 0; y < 10; y++) {
        Point p1 = Point((tenthWidth * x) + 11, (tenthHeight * y) + 11);
        gamePieces.push_back(Mat(roi, Rect(p1.x, p1.y, tenthHeight, tenthWidth)));
    }
}
for (int i = 0; i < gamePieces.size(); i++) {
    char name [4];
    sprintf(name, "w%d", i);
    namedWindow(name, CV_WINDOW_AUTOSIZE);
    imshow(name, gamePieces[i]);
}
 |
| Each of the game pieces displayed in their own window. All 100 of them. |
Right! We are in the home stretch now, just a little more work and we'll have our game board represented in a computer readable form! Excitement should be bursting out your eyeballs right now.
As always there are several ways to reason about the data we have and the method we will use will depend on what we want to know about the image. For now I am content with working out what the piece is is the middle of the image and really there are 2 obvious ways of judging this, we can go with either shape or the colour. For now we'll go with colour because it is really easy to find, we have already done so when getting the colour of the border, except this time we are going to read the RGB value of the pixels we are interested in from within our program and not rely on any external programs.
To do this we'll grab a pixel from the middle of each of the game piece images and read its RGB data. We'll also need somewhere to keep track of this so we'll make an array to keep track of the colour we find in each image. An array of ints will do the job of keeping track of each colour we find since we can use the number 1 to represent PURPLE 2 to represent RED, 4 to represent GREEN and 8 to represent BLUE. We use these numbers so that we can represent other things along with them when we come to learn more about each game piece image, don't worry, I'll talk more about it later when we come to do some real reasoning. For now, as always, you'll just have to trust me (I haven't let you down so far have I!?!).
To make life a little easier I'm going to make the array of ints a 2D array, this way it represents the game board a lot clearer. If you're not a fan of them you can stick to a normally array but I really hope you give the 2D's a try, they are brilliant for this type of thing when you get your head round them.
Ok, normally when writing this blog I write along side coding so I'll code a little bit, write a little bit then code a little more and go back to writing. This makes it really easy to explain how I worked something out but so far everything has been pretty straight forward. For this part I had to do the whole thing to make sure it would work which means I have a big block of completed code here that I'm going to have to explain. So that's your warning, there is a lot to take in here so get ready!
int gameState[10][10];
int PURPLE_PIECE = 1, RED_PIECE = 2, GREEN_PIECE = 4, BLUE_PIECE = 8;
Scalar PURPLE(120, 32, 116, 255), RED(95, 86, 199, 255), GREEN(30, 178, 23, 255), BLUE(199, 110, 33, 255);
Vector<Scalar> possibleColours;
possibleColours.push_back(PURPLE);
possibleColours.push_back(RED);
possibleColours.push_back(GREEN);
possibleColours.push_back(BLUE);
Now into our main loop (Brace yourself!):
//Get the colour of the middle pixel in each image and save it in our 2D array
for (int row = 0; row < 10; row++) {
for (int column = 0; column < 10; column++) {
Mat currentGamePeice = gamePieces[(column * 10) + row];
Vec4b midPixelColour = currentGamePeice.at<Vec4b > (currentGamePeice.cols / 2, currentGamePeice.rows / 2);
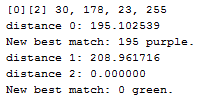
printf("[%d][%d] %d, %d, %d, %d\n", row, column, midPixelColour[0], midPixelColour[1], midPixelColour[2], midPixelColour[3]);
fflush(stdout);
Scalar current(midPixelColour);
int bestMatch = INT_MAX;
int pieceColour = 0;
//for each possible colour compare against our current colour and
//save the int for the best match in our game state
for (int i = 0; i < possibleColours.size(); i++) {
Scalar testColour = possibleColours[i];
int db = current[0] - testColour[0];
int dg = current[1] - testColour[1];
int dr = current[2] - testColour[2];
float dist = sqrt((db * db) + (dg * dg) + (dr * dr));
printf("distance %i: %f \n", i, dist);
if (dist < bestMatch) {
bestMatch = dist;
printf("New best match: %d ", bestMatch);
if (i == 0) {
pieceColour = PURPLE_PIECE;
printf("purple.\n");
}
if (i == 1) {
pieceColour = RED_PIECE;
printf("red.\n");
}
if (i == 2) {
pieceColour = GREEN_PIECE;
printf("green.\n");
}
if (i == 3) {
pieceColour = BLUE_PIECE;
printf("blue.\n");
}
}
}
gameState[row][column] = pieceColour;
}
}
In our game board we have 10 rows and 10 columns, so we repeat the reasoning for each of them going left to right top to bottom because this is the way I prefer and is the way our gameState array will end up. We grab our individual game piece image from the vector of them we created earlier then we create a Vec4b (a vector of 4 bytes) using Mat's built in 'at' method which gives you the data of the pixel you ask for using a point in the image, the point we get is the middle point of the image.
We then print this data out to the screen using the 'printf' function which formats the bytes in the Vec4b properly for us. This is how I got the values for the comparison scalars I talked about earlier, by printing out the data and comparing it to the game piece it was from (although by now you should be able to tell what colour it is from just reading the data, although until you are certain about the order of the RGB bytes it's better to check against something you are certain about). We then convert this to a scalar as well for comparison.
Then we declare our bestMatch int and set it as high as possible, when we are reasoning the lower the number the better the match. Next is the pieceColour int which is where we store the number representing the colour of our piece, remember the PURPLE_PIECE = 1 and so on from earlier. Next we enter a loop where we do our comparison of the colour we have read against all the possible colours it could be.
To do the comparison we first work out the difference between the blue, green and red between the colours by subtracting one from another and then we do a little bit of 3 dimensional Pythagoras to find out the distance between them, hence the smaller the value the better as it means they are a closer match.
We print out the value we got and if it is a better match than our current one (which it always will be the first time round the loop) we set our bestMatch variable to the current value and set our pieceColour variable to purple, red, green or blue depending on which iteration through the loop this is. Finally, once we have tested all possible colours we set the value of our gameState to the one that was the best match.
When we are finally done testing and setting all our values we get to see the fruits of our labour by printing the game state to the console, and we do it row at a time so it matches the layout of the game board image and makes it easy to compare. Here is the code for that part:
cout << "Game state:\n";
for (int x = 0; x < 10; x++) {
    for (int y = 0; y < 10; y++) {
        cout << gameState[x][y] << " ";
        }
    cout << "\n";
}
fflush(stdout);
 | |
|
 |
| Our gameState, the results of our hard work. 1 = Purple, 2 = Red, 4 = Green, 8 = Blue. |
 |
| The game board we were reasoning on. |
Well it looks pretty good to me, in fact I'd go far enough to say it looks perfect! Ok the code needs a bit of cleaning up and I'm going to go off and do that before the next post but for now I think we can safely say Step 1 is done!
We can locate the game board, extract it, extract the pieces and work out what colour they are and store the results for reasoning on. Brilliant!
No comments:
Post a Comment